TrigBoard
...Back to Projects:
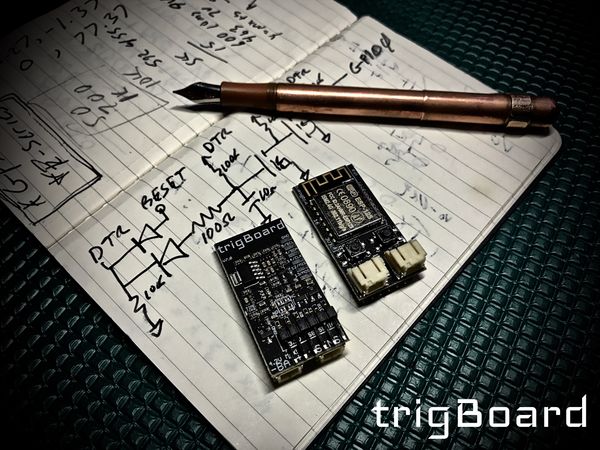
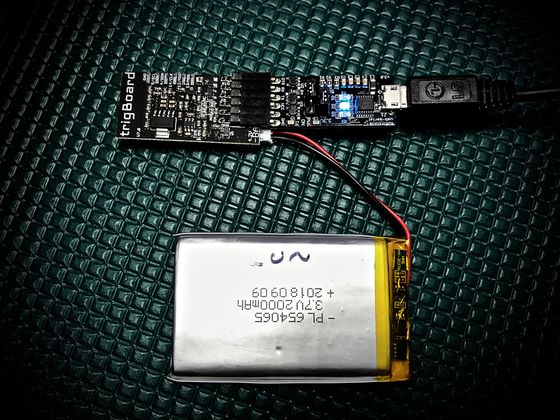
The trigBoard is an IoT project that does one thing - it pushes you a notification triggered by a digital input. Well, it's much more than that, but this is the inspiration. I wanted to design a WiFi board that essentially sleeps most of its life, but when that door switch, flood sensor, motion sensor, etc.. gets triggered, I just want a notification immediately on my phone. And that's about it... a perfect IoT device in the background doing its job.
Contents
Latest Release Version 7
Looking for Rev4? Go here TrigBoardV4
- Simple IoT development board that was designed to trigger "Push Notifications" on a smart phone/tablet based on a trigger event.
- Unique low-power front-end to enable sub 1uA sleep current - uses a pulse to trigger wake-up, so even if door/window/etc is opened, the same ultra low currents can be maintained. Compare to standard pull-up/down resistor based digital input designs with significantly higher leakage current.
- The board will wake itself up once an hour to check the battery voltage - if running low, a push notification is sent to warn the user. This timer can be used to check other things as well - temperature changes, accelerometers, or other environmental sensors.
- Based on ESP8266 WiFi Module (ESP-12S) - all source code is available for download and developed in the popular Arduino IDE.
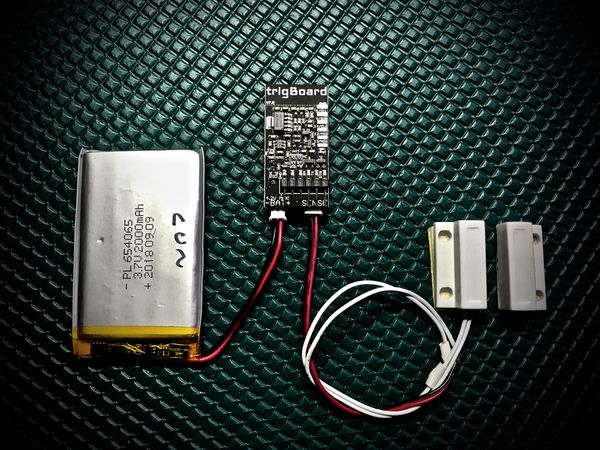
- Battery Input can be any Lithium Polymer 3.7V - standard micro JST connector jack is used (please double check polarity),any of these would work nicely.
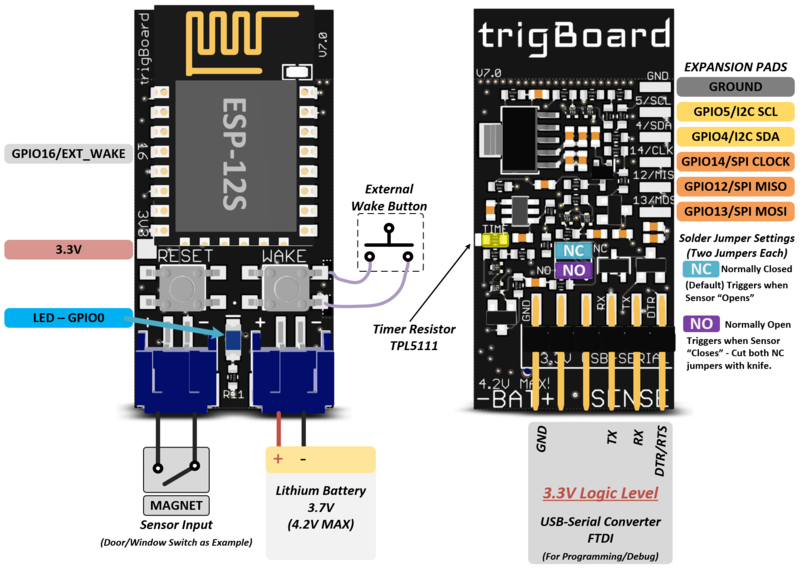
- Sensor input to trigger the "Wake Up" is a simple passive switch. Typically a standard magnetic door/window switch is used and the board can be configured to wake on the "opening" (Normally Closed) or "closure" (Normally Open) of the contact. Solder jumpers set this - Normally Closed is Default, so standard door/window switches wake the board up when opened.
- Auto-Reset circuitry built-in, so now with an FTDI USB-Serial Converter, just click "upload" and the board starts programming. Note that this was designed to work with this The_USB_to_Serial_Converter:
- Expansion pads broken out, so integration with custom projects is possible.
- Dimensions only 0.8" x 1.6 " (20.32mm x 40.64mm)
trigBoard mentions
Purchase trigBoard
Out of the Box Setup
The setup for getting the trigBoard installed is very easy. The base firmware that comes loaded on the board is ready to work with PushSafer. This makes it so easy to get up and running with the trigBoard. I switched from Pushbullet on the V4 board due to reliability and compatibility issues. Push Safer also has more attractive billing options. Instead of a monthly fee, now you just pay for the amount of notifications you want... when they run out, you just buy more. Best part is that they're super cheap.
Push Safer Setup
- Go here: https://www.pushsafer.com and register.
- Download the mobile app for iOS or Android, and sign in. You can also setup push notifications for your computers as well by installing the browser plugins. You may even like getting the desktop notifications better.
- Go back to dashboard and copy your private key
Notable Push Safer Features:
- Ability to send test messages from the dashboard
- Can "Mute" devices by toggling the Status switch in the dashboard
- Guest Devices by just scanning a QR code, then can enable/disable them as needed. Like for home security, you could give to a family member while you're out on vacation.
- Great support and a lot of exciting development!
- There are many more useful features in there as well... feel free to experiment!
trigBoard Setup
- Battery
- Battery Options - You will need a 3.7V Lithium Battery - fully charged will be 4.2V. The battery connects to the trigBoard using a standard micro-JST connector. Any of these would work. Battery estimator calculations coming soon, but I typically use a ~1000mAh battery on all my doors/windows... that yields very long battery life. CHECK POLARITY! This can damage the board, so check the drawing above and also the + and - symbols on the board match your battery.
- Charging - This version of the board does not have a charge port, so you might want to pick something like this up as well https://www.adafruit.com/product/1304
- Sensors
- Dry Contact Switch - magnetic door/window sensors like these
- Connectors - They are "Micro JST", I go with these. It would be nice to find magnetic switches with the JST connectors already soldered on...
- Jumpers - By default, the board is configured to "Wake" when the contact opens. This is the normally closed mode of operation. If it is desired to wake on a closure of the contact, then see the diagram above and desolder the NC solder jumpers and cut them open with a knife (on this board, I made the jumpers with tiny traces) and solder across the NO jumpers (make sure they are closed). That default NC configuration was chosen because the magnetic door/window sensors are closed when the magnet is in proximity, so the trigBoard wakes up when the door/window is opened.
- IMPORTANT NOTE ABOUT TIMER - The trigBoard performs a calibration on the built-in timer on power-up. The sensor input must be closed when powered up, otherwise the 1hr timer will not be accurate. You basically just need to have the door/window closed before the battery is plugged in. Sensor should be closed if using NC jumpers, Open if NO jumpers.
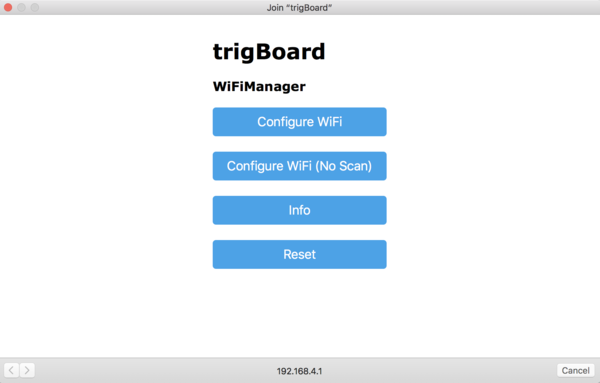
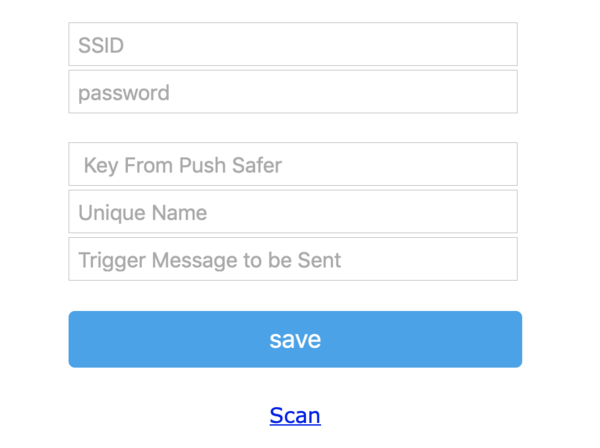
Before mounting the trigBoard in it's final location, a simple bench test is helpful to make sure everything is setup. With the battery and sensor plugged in, simply press the "Wake" button on the board. You should see the LED turn on, then turn off. This is normal, because the firmware checks to see if the WiFi settings are configured, and if not, it just goes back to sleep. To enter in the WiFi settings, you have to press and hold the "Wake" button until you see the LED flash, then let go. The LED should remain solid at this point. You now have 2 minutes to configure the trigBoard. From a computer (easier) or mobile device, go to your WiFi settings and search for available networks. Connect to the "trigBoard" network. A captive portal window should automatically pop up:
If you don't see a captive portal, you may need to open your browser and attempt to load a website. Try to google something. If you still don't see the portal, then you can try connecting directly to the board - in the browser, type in 192.168.4.1 in the address box. That should connect you to the portal. If you're still having problems, try disconnecting the battery from the board and allow the trigBoard SSID to fade away from the available networks on your computer. Then plug the battery back in and try again. Seems that on windows this may take more than one try. I've also seen issues where the computer defaults to the ethernet connection when the WiFi network does not have an internet service. If you think you're having this problem, just unplug the ethernet cable from your computer.
Click configure, and select the network that you trigBoard to use and enter in the password. You'll now see where you want to enter in the private Push Safer key. Then you can give the board a name, and a trigger message. Once that's entered in, click Save and you're all done! Once you click save, watch the LED on the trigBoard. It should start flashing quickly, indicating that the settings were saved and that it was able to connect to that network. Then, to test, just press the wake button for about a second, or use the sensor switch input. If all was set up properly, you should get a notification!
Base Firmware
Note! the board is preloaded with the base firmware out-of-the-box, but if you want to develop/modify your own firmware, this section will go through the steps for getting the base code to compile. Then you can develop your own code to run on the trigBoard!!
Base Firmware Downloads:
Arduino Code 12/16/18
Bin File for OTA programming
First Release
Tested on Arduino v1.8.8, ESP core v2.4.2, WiFi Manager v0.14.0, Arduino JSON v5.13.4
Base Firmware Developed on Arduino IDE - can download Here or Here for previous versions
Then you'll find that the code does not compile and that's because you need several libraries and the board manager installed. Here's what you need:
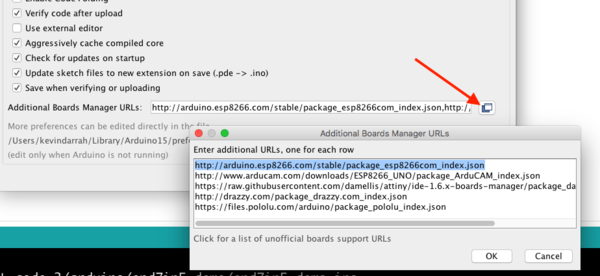
First, go to File>>Preferences and add this URL to to the "Additional Boards Manager URL". http://arduino.esp8266.com/stable/package_esp8266com_index.json
Now, the ESP8266 boards will be available for installation. Go to Tools>>Board>>Boards Manager... Search for ESP8266, and go ahead and click install.
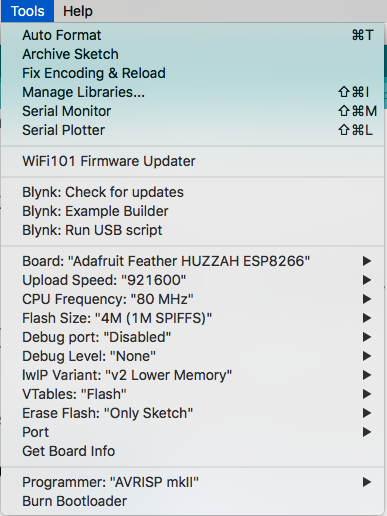
After the boards are installed, you can select any of the ESP8266 boards out there from the Board Selection. For the trigBoard, I have been using the Adafruit Huzzah, here are my settings. Note that I always upload as fast as possible:
Next, you'll need to install the specific Arduino Libraries I'm using in the base code. The first one is is the WiFi Manager by tzapu - the easiest way to install the library is to go to Sketch>>Include Library>>Manage Libraries. Then type in WIFImanager. Go ahead and install the library.
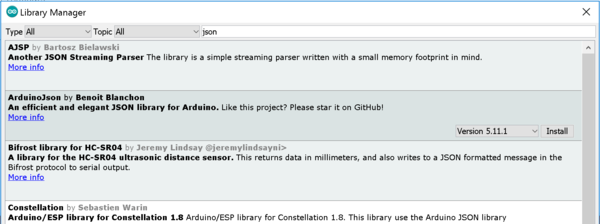
Do the same for the Arduino JSON library by Benoit Blanchon - can just search for JSON.
We're also using the Push Safer library to keep things easy. You can get that here: https://github.com/appzer/pushsafer-arduino-library
Download that zip file, then head over to the Arduino IDE, and add zip library:
Then that should be it - the other libraries are automatically installed with the ESP8266 board manager.
See the "Testing and Programming" section below for information on loading the code over a wired USB-Serial connection. The other option is to load code wirelessly "OTA - Over the Air". In the "trigBoard Operation" section this is shown.
Programming
Note that the USB-Serial Converter that I designed is known to work - other versions of it may not. Here is the wiki page for the USB-Serial Board: The_USB_to_Serial_Converter:, and can be purchased here: https://www.tindie.com/products/13817/
The OTA link to upload the bin file: http://trigboard.local/update
Projects
Andreas Spiess' Weather Forecaster
WeatherBoard BME280 and LMT01 Weather Station
EPaperBoard E-Paper Display
CameraBoard Camera System with Arducam
Clear Sky Indicator for Astronomy Project to connect to https://openweathermap.org to get weather details, then indicate if sky is clear or not.
TrigBoardStillOn Simple Hack to see check if digital input is still open using the timer. Did you leave the door/lock or whatever open?
Mechanical
Autodesk link to 3D viewer (you can download step file): https://a360.co/2EIjWEe
Schematic
Coming Soon
Rev 4 Compatibility
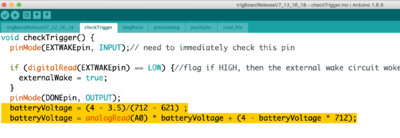
Everything is pretty much the same as Rev 4, but if you have code running on the Rev 4 and want to program that on a Rev7, you will have to change how it measures the battery voltage. I changed the voltage divider resistors:
 batteryVoltage = (4 - 3.5)/(712 - 621) ;
 batteryVoltage = analogRead(A0) * batteryVoltage + (4 - batteryVoltage * 712);
Expansion
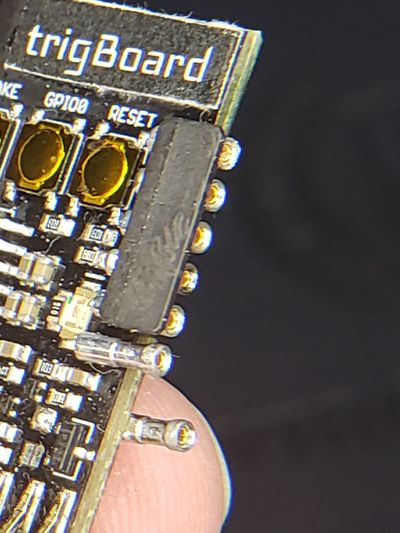
You can design your own "mini" boards to pair up with the trigBoard - soldering wires to the board works, or even pluggable type connectors like these and these. (Thanks Daniel B for the tip!)
Disclaimer
I'm just a guy who designs boards, so I'll try my best to support you as much as I can and provide tutorials as I have time for. Every board that is sold has been functionally tested, so that they can be programmed, the sleep current is right, they can be woken up, the battery voltage measurement is "close", and active current is consistent with a working board. Also, these boards are for educational, hobbyists, DIYer, maker, and development use only. If you are interested in working this board into your product, please contact me for more information
